Staff Accounts
Introduction
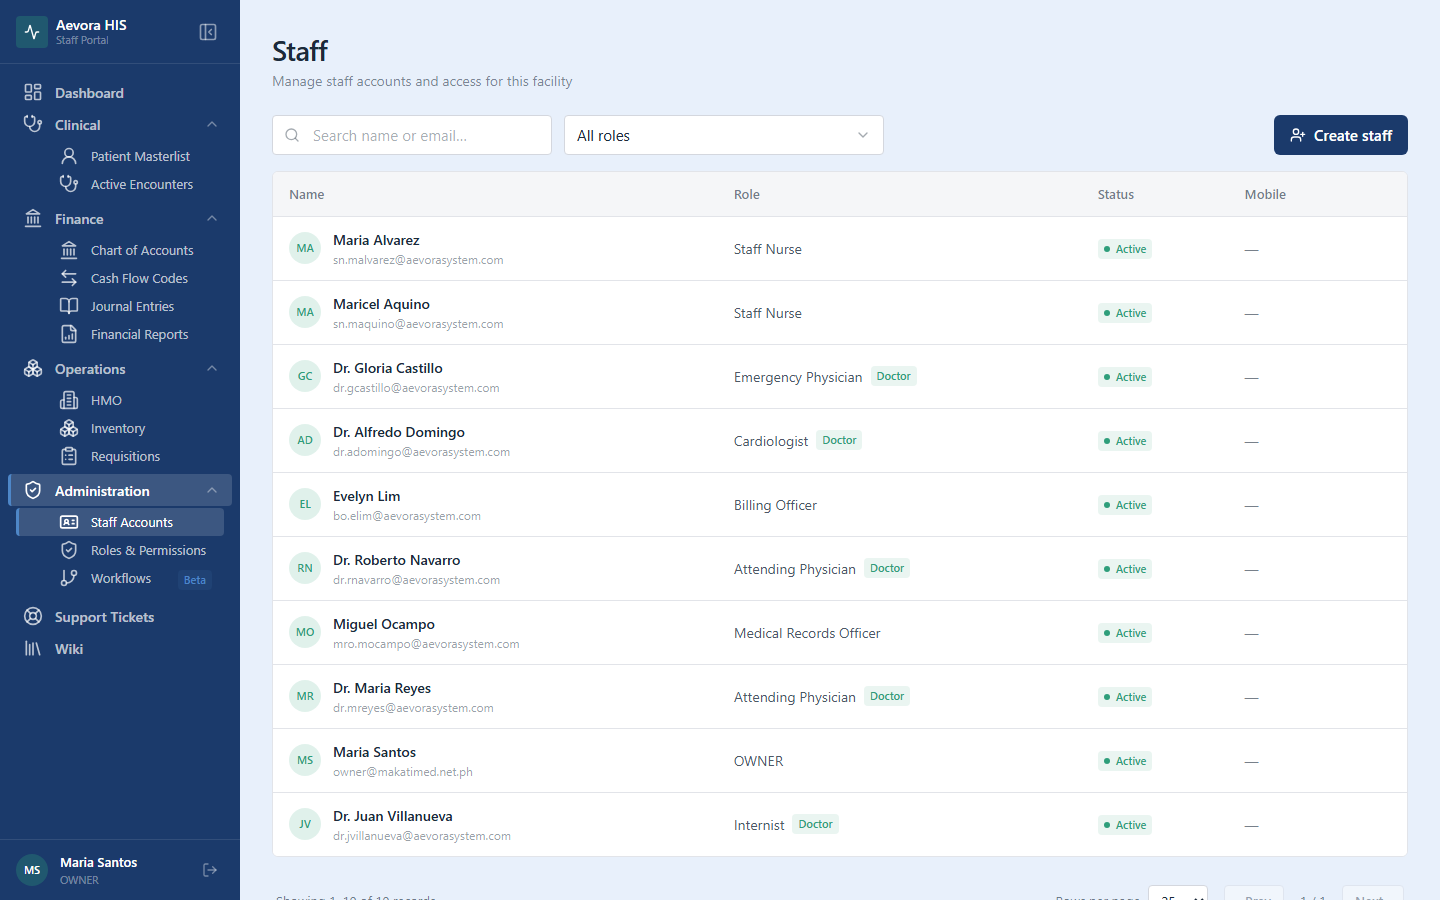
Section titled “Introduction”The Staff Accounts module is where system administrators register every person who works at the facility, maintain their government-mandated Personal Data Sheet (PDS), and control who can log in to the staff portal at all. A person can exist as a staff record without ever having login access — login credentials are a separate, optional layer on top of the personnel record.
Key Concepts
Section titled “Key Concepts”Who Has Access
Section titled “Who Has Access”The Staff Accounts module is visible only to staff with the staff → view permission. Registering and editing staff requires create and update respectively. In most facilities this is limited to a System Administrator or HR Officer.
The Staff Record Has Nine Sections
Section titled “The Staff Record Has Nine Sections”Every staff record is organized into the same nine sections, whether you’re registering someone new or editing an existing record:
| Section | Contents |
|---|---|
| Personal Information | Name, birth details, sex, civil status, vital stats, citizenship, address, government IDs (TIN, SSS, PhilHealth, Pag-IBIG, GSIS) |
| Family Background | Spouse, children, and parents’ information |
| Educational Background | School history |
| Civil Service | Civil service eligibility records, with supporting documents |
| Work Experience | Prior employment history |
| Compensation | Salary, allowances, deductions, and benefits |
| Work Schedule | Weekly working hours, and slot configuration for staff who take appointments |
| Leaves | Recorded leave dates, kept as a permanent audit trail — voided rather than deleted |
| Roles and Credentials | Role assignment and login access (see below) |
Work Schedule and Leaves are available for every staff member, not only doctors, and can be filled in during either Create or Edit — you don’t need to save the record first.
Login Access Is Optional and Separate
Section titled “Login Access Is Optional and Separate”A staff record can exist with no login access at all — useful for personnel whose records you need for HR purposes but who never need to touch the system. Login access is turned on per-record from the Roles and Credentials section, with its own username, email, and password. Removing login access later doesn’t delete the person’s record or their history — it only revokes their ability to sign in.
Use Cases
Section titled “Use Cases”Creating a Staff Account
Section titled “Creating a Staff Account”- Go to Administration → Staff Accounts.
- Click New Staff.
- Fill in at least the Personal Information section — name and other identity fields.
- Optionally complete the Family, Education, Civil Service, Work Experience, Compensation, Work Schedule, and Leaves sections.
- In Roles and Credentials, assign a Role (see Roles & Permissions) and, if this person needs to log in, enable credentials:
- Enter a username and email.
- Choose Auto-generate password or set one manually (minimum 8 characters).
- Click Save.
If you auto-generated a password, it’s displayed once in a confirmation dialog — copy it and share it securely with the staff member (sealed envelope, secure messaging, or direct verbal communication; never by unencrypted email or SMS). Aevora cannot show it to you again afterward.
Editing a Staff Account
Section titled “Editing a Staff Account”Open the staff record from the list and update any section, including the assigned role. Changes to a role assignment take effect on the staff member’s next login.
Resetting a Password
Section titled “Resetting a Password”There’s no separate “reset password” flow — open the staff record’s Roles and Credentials section, choose to set a new password (auto-generated or manual), and save. Share the new password with the same care as when the account was first created.
Removing Login Access
Section titled “Removing Login Access”Open the staff record’s Roles and Credentials section and remove credentials. This revokes the username, email, and password — the person can no longer sign in — but keeps their personnel record and history intact. This is different from deactivating the whole record (below).
Setting a Work Schedule
Section titled “Setting a Work Schedule”Open the staff record’s Work Schedule section, toggle on the days worked, and set the hours for each day. If the role is a doctor role, also set the slot duration and max bookings per slot — these control the appointment slots shown when booking that doctor.
Recording and Voiding a Leave
Section titled “Recording and Voiding a Leave”Open the staff record’s Leaves section and click Add leave to record a date range and, optionally, a reason. A leave blocks appointment booking for that staff member on the covered dates.
Leave records are never deleted — voiding one (with a reason) keeps it visible in the list, marked as voided, so there’s a permanent record for payroll and audit purposes.
Deactivating a Staff Account
Section titled “Deactivating a Staff Account”When a staff member leaves the facility, retires, or is terminated, deactivate their record so it’s clearly marked inactive:
- Open the staff record.
- In Roles and Credentials, turn off Active.
- Click Save.
A deactivated account can still complete the login screen, but every subsequent action in the app is rejected with “Account is inactive” — in practice this signs the person straight back out. Deactivating does not delete the record; all historical activity tied to it (journal entries, clinical notes, encounters) is preserved.
Reference
Section titled “Reference”Staff List Columns
Section titled “Staff List Columns”| Column | Notes |
|---|---|
| Name | Full name (Last, First) |
| Role | The access role assigned to this record |
| Status | Active / Inactive |
Permissions
Section titled “Permissions”Managing staff requires the staff permission (view / create / update). There is no separate delete action — inactive records are kept, not removed.